A Realistic Guide to Preparing for Practical Assessments (OSCE)

Read time: 12 minutes

Sujikka Suthakaran (Year 6) runs through how you can approach preparing for your summative OSCE assessment during your clinical years. 

The thought of completing practical assessments at the end of the year can be very daunting, especially considering the large variety of skills and knowledge you will be tested on. However, the reason why OSCEs form part of our summative exams is to ensure that we become good and safe doctors by testing the important competencies that are required of one. It’s very normal to feel nervous about this exam but hopefully, by covering some of the different methods and resources you can use to prepare for your OSCEs in this article, this will alleviate some of the stress.

To prepare for your OSCE it’s important to understand the structure of the exam and the different types of skills that will be tested. There will be a Q&A session organised by the Assessment & Feedback Unit, so make sure you attend to find out more about this as well as the timings of the exam and what your role will be in the stations e.g. in Year 4 you will be a Year 4 medical student (although sometimes in a simulated FY1 setting) whereas in Year 5 (and Year 6) you act as a Foundation Year 1 doctor. All this information and more is available on the Assessment & Feedback Unit Moodle page

There are several station types that you may encounter in your OSCE, however these are often integrated rather than a single type of station:

  • Consultation skills
  • Short clinical assessments
  • Medical emergencies
  • Practical skills 
  • Written communication & practical prescribing

With this in mind, here are some approaches you can take to prepare yourself for tackling these stations on the day of your exam.

Form an OSCE group

It can be difficult to know where to begin with preparing for the OSCEs, but the first thing you should do is to form OSCE groups, if you haven’t already. Whether it be your friends, flatmates or those in your firm, having a group of people you can meet up with on a weekly basis either in person or remotely to practise doing OSCE stations is really beneficial. You’ll get the opportunity to run through multiple stations from various resources testing lots of different skills. As such, this should help prepare you for how you approach each particular station when it comes to your OSCE. 

A resource I would recommend is the book “OSCE Cases with Mark Schemes” which contains a variety of stations assessing different skills in each speciality in addition to detailed mark schemes. As you begin a new rotation, it’s often useful to start off by asking your OSCE group to practise history taking stations initially and then move on to explaining/interpreting stations to allow more time to go over the speciality topics thoroughly enough to answer the questions being asked in the station. 

Check out the Moodle Assessment and Feedback Page

As mentioned before, the Moodle Assessment & Feedback Unit Page is the place to be for all things exam-related. It contains information regarding your exam dates, a summary of both formative and summative assessments, the methods by which your exams are marked in addition to sample OSCE stations which are in the OSCE resources section. I found the latter to be extremely helpful in understanding how certain topics can be assessed, how the mark schemes are structured and what information is important to mention in such clinical scenarios. It may be beneficial for you to attempt these stations closer to exams or after you’ve completed the speciality the station is linked to, as they can be slightly challenging and you may be better equipped to practise these stations after you have done some revision. Nevertheless, don’t let this stop you and you can even use these sample stations as a guide to create your own.

Not only are there practice stations within the OSCE resources, there’s a table with a summary of all the OSCE stations from 2013 onwards for your year group.

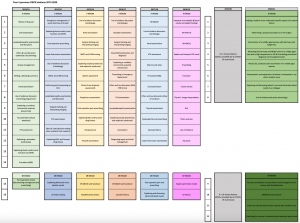
As the aim of these assessments are to test your competency of doing tasks required of a junior doctor, there are several skills that are tested each year which form part of the assessment criteria for your year group. For example, I’ve attached the previous Year 4 OSCE stations where you’re able to see the common skills that you are expected to know:

  • History-taking and explaining management
  • Examination skills
  • Interpreting blood test results
  • Performing procedures (ABG’s, cannulation)
  • Knowledge about Ethics and Law
  • Appropriately dealing with an emergency situation using a DRABCDE response (and being able to deliver a clear handover)
  • Documentation in ward round notes and prescribing
  • Communicating effectively with other healthcare professionals
  • Knowledge about Use of Evidence

Therefore, practising these common skills whilst you’re on placement or with your OSCE groups will stand you in good stead when it comes to your exams. Again, you can use the previous station titles to come up with stations of your own or find similar stations online.

For fourth year students, you will have a dedicated Critical Care Day session during your Acute Medicine placement with the Clinical Skills team, where you learn to manage critically ill patients using a DRABCDE approach. Not only that, but you will also have the opportunity to practise mock OSCE stations, so use this session to clarify any doubts you may have and you can repeat these OSCE stations for revision closer to exams. 

A Use of Evidence Station usually entails a patient coming in to see you about a research article they’ve read online; about a particular drug they’re taking or have heard about. You will be shown the abstract of the article and will be asked questions by the patient regarding what the conclusion of the article is, what certain words mean (e.g. sensitivity, number needed to treat) and whether you would recommend the patient taking the medication based on their history. 

Considering that medicine here at UCLMS is a spiral course, you are expected to recall knowledge from earlier years in your later years. Therefore, based on this information you know that you will need to revise the statistics we learnt in CPP to do well in this station. This same principle applies to Ethics and Law stations as previously learnt knowledge is required in addition to attending your dedicated CPP sessions in fourth year. This tutorial is really useful in covering the important topics you need to know for both types of stations and is available on the Clinical years Treasure Trove (which contains lots of tutorials/resources to help you prepare for exams). I would also recommend creating Use of Evidence Stations yourselves, by finding research articles, looking at the abstracts and coming up with questions to ask so that you can practise doing these stations with those in your OSCE Group.

Spend time on the wards

Interacting with patients you meet is the best way to truly prepare for your exams, as you’ll be doing the same thing you did on the wards in an OSCE station under time pressure. Therefore, the more you speak to patients, the more prepared you’ll feel when it comes to exam day and thus, the better doctor you will be.

Whenever you go into placement, set a goal in your mind about what you want to gain out of attending based on the skills required of you as a junior doctor. Ask your supervising clinician which patients would be good to clerk/examine and speak to them about your differential diagnosis as well as coming up with a management plan. Offer to document in the notes during ward rounds (remember to get this countersigned by a doctor), as this will be your bread and butter when you become a Foundation Year 1 doctor. Look up any investigations the patients may have had e.g. blood test results, ABG analysis, ECG, chest x-ray and try to interpret these results yourself before discussing with your doctor. Especially with imaging, it’s not only good practice to interpret what you see but also to present your findings as this could also be asked of you in the OSCE. Seek out opportunities to practise procedures such as cannulation, ABG’s, catheterisation as you are required to be confident in performing these when you become a doctor plus, you get a sign off for your procedures list so it’s a win-win situation. 

Geeky Medics is a great resource for learning how to interpret investigations, especially for radiology as they give a clear structure that you can follow. In addition, they have videos and a step by step guide to performing the procedures mentioned above. Another resource I’ve found useful for imaging is Radiology Masterclass.

Make use of your tutors around you

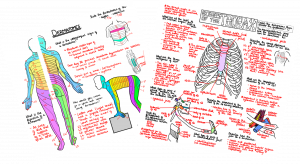
An examination station comes up every year without fail so if you prepare well, these can be easy marks you can obtain on the day. Your twilight tutor sessions (Y4 students) are really good opportunities to practise performing examinations, particularly if you ask to see patients with clinical signs, as you’ll be able to receive personalised feedback and see in person what certain signs look like/sound. Make sure you learn your examinations earlier on, as the closer you get to your exams, the more difficult it can be to balance learning everything in the curriculum so practising this now will be one less thing to worry about later on. In addition to this, after you become confident with the steps of your examination, aim to complete them in timed conditions to replicate the time pressure during the OSCE.

You may also be allocated a tutor for teaching depending on the rotation you’re on, so use these tutorials to go over any topics you find difficult to understand as well as going over skills that you aren’t able to learn from a textbook e.g. prescribing, ward documentation, examination skills or just any of the skills mentioned in the list above. When you get closer to your exams, you might want to do OSCE-Practice style tutorials with your tutor/twilight tutor e.g. I went over paediatric history-taking, ABCDE stations and prescribing with my paediatrics tutor.
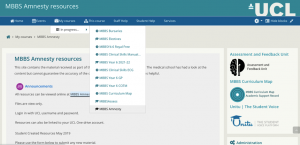
Amnesty 

Amnesty is a goldmine for practice OSCE stations (mainly for Y5 students) as well as information about stations from previous years. However, be cautious about using these resources as the content has not been checked for accuracy by the medical school and some documents contain information about OSCE stations prior to 2018 which could be outdated/incorrect. Therefore, whilst they are useful, do remember to fact-check the information with updated guidance if you’re going to be using the stations for revision.

For Year 5 students, the updated OSCE pack and MBBS Y5 OSCEs Round up are amazing albeit outdated resources for all things related to the OSCEs. It contains multiple mark schemes for all sorts of stations that could potentially come up depending on the speciality, so I really recommend using this as a resource for practising OSCE stations. Not only that but the first few pages contain very detailed information about the content of OSCE stations prior to 2018 so this would be really good for you to read to understand what could be expected of you in your exam. As cliché as it sounds, common conditions are common and in order to prepare you for encountering these as a doctor, certain topics can be tested repeatedly; however, do be mindful that the content and station focus changes each year. Therefore, when using these resources for revision, be cautious with the information as the curriculum has changed since 2018. These Amnesty mark schemes are more beneficial for revision purposes as opposed to being indicative of what the summative mark scheme will entail so check the sample OSCE stations on the Moodle Assessment & Feedback page for guidance.

With a prescribing task being a feature of many OSCE stations in your summatives, I found running through the different scenarios in the Acute Prescribing presentation (specific to Y5) to be really helpful and would encourage you to do the same. These are just some of the documents I personally used the most when revising for OSCEs, however there’s lots more that you can go through to get more insight into your exam.

Mock OSCE

A mock OSCE is a formative assessment which is designed to simulate your summative OSCE in order for you to get a flavour of how your exam day will run. It’s a brilliant learning experience, as you will have the opportunity to practise various different skills, assess your ability to perform under time pressure and you’ll get feedback which should enable you to plug any gaps in your knowledge. Plus, as this assessment doesn’t count towards anything, it’s the perfect place to make mistakes as that’s how you’ll learn from them.

For those of you in Year 4, you should have a clinical skills mock OSCE at the end of your Module B placement, where you will have stations going through different procedures that you were taught during your clinical skills sessions. Make sure to utilise this session carefully and retain the mark schemes for practice as these procedural skills can be tested. UCL Medical and Surgical Society also organise mock OSCEs, so make sure you like their Facebook pages to keep up to date with any mock OSCE announcements. 

For Year 5 students, you will have numerous workshops dotted throughout each module; some of which involve actors and tutors for supervision. These are really useful sessions which test your consultation skills as done in the OSCE. 


There’s a lot of information to digest here, but don’t worry you have time and if you pace yourselves from now until the end of the academic year, you’ll be able to cover a lot of ground. Good luck with your revision and all the best for your exams.

Resources:

Top Ten YouTubers for Pre-Clinical Medicine


Read Time: 9 minutes 

Anika Koithara (Year 4) takes you through the ten best youtube channels to help aid learning the material of the early years of medical school.

The first few years of medical school are constantly underestimated in their intensity. It’s mostly lectures after all but let’s be honest, the workload is like no other.

It’s the golden triangle of biochemistry, anatomy and physiology. Oh wait, let’s not forget pharmacology, clinical skills and the rest of it. It isn’t a triangle, it’s probably more like a dodecahedron. However, this article will breakdown the top-ten list of fantastic YouTubers that will help get you through the degree. 

This list will feature lesser known but useful YouTubers along with a few much more popular channels. Honourable mentions should of course go to both Lecturio and Osmosis for their content, however, this article will feature individual YouTubers who are mostly free to access.

Quick disclaimer: Obviously, this is one person’s opinion, so feel free to check any of the channels out and make your own mind up. Let us know if we’ve missed any of your favourites in the comments section. 

Each YouTube channel was rated based on three key factors:

  1. Range of content/topics available
  2. Quality of delivery/engagement
  3. Level of detail to the videos.

So let’s get into it. 

  1. Speed Pharmacology

This channel specialises in highlighting how different therapeutical drugs work. It covers a range of different types of medication; their mechanisms of action, side effects and contraindications. Each video consists of quite straightforward explanations with an emphasis on how the drugs are grouped/classified. This makes it easier to keep the different drugs in your head and to mind map the information, for revision. 

In terms of delivery, if you can get past the slightly odd tone and intonation of the explanations, then it still serves to engage well. The videos are very diagrammatic and colourful to keep those of you who are visual learners happy. 🙂

Level of detail is probably enough to help you answer SBAs and figure things out by process of elimination. However, for assignments such as writing a poster based on how a drug works or assessments where more detailed knowledge is required. These videos would serve more as a good spring-board for what to read further into. 

Top tip for this channel: Use the video playlists to structure your revision. The drugs are nicely organised into sections which will help make your learning more systematic . 

9. Medicosis Perfectionalis

It’s name boasts a big promise of ‘perfecting’ medicine. However, we all know that’s not really possible. For those visual learners, this channel is perfect. Not only does it have exciting thumbnails that demonstrate what the video is trying to explain; it also embraces the concept of short and sweet, with each video averaging around 6/7 minutes.

This is perfect for those who need a quick refresher of a topic, in anticipation of being quizzed in tutorials.

Also, what the channel achieves by shortening individual videos, is a larger range of content. The channel covers everything from organelle structure to key clinical signs of particular pathologies. The level of detail and explanations is reasonable, meaning that you could probably review a topic with a video and flicking through some of the lecture notes from the Treasure trove.

The only pitfall to this channel is the awkward sometimes stilted narration and unusual intro sequence. Hence 9th place.

Top tip for this channel: Skip the first 5-10s after the ad (the videos have an odd intro sequence)

8. Drbeen Medical Lectures

For those of you who haven’t seen this channel, do check it out. Although a little less known, this channel is great as a starting point for your learning of different topics. Dr Been scores well for effective delivery of material which is quite old school, in that its just a teacher and his whiteboard. However, complex topics get broken down effectively into bite-size, more manageable amounts.

Dr Been’s range of topics is huge and conveniently organised by system. The level of detail is pretty good, but you could always do with keeping a copy of Gray’s or a physiology textbook nearby. Be careful to ensure you are watching what is relevant to your revision, and then if you’re a keen bean, there are a few interesting interviews and videos relating to COVID-19 as well → might be handy for that I&D module in first year.

Top tip for this channel: Keep a pen and paper handy whilst watching, will make going through/reviewing the content after watching the video much easier.

  1. Khan Academy

How can we write about educational videos on Youtube and not mention this channel! A great channel for understanding key concepts in clinical medicine e.g. V/Q mismatch and the cardiac cycle. This channel is fantastic for engagement and has enthusiastic high energy narration. Although maybe that’s just the American accent in general.

Khan Academy’s range of content is great for pre-clinical medicine, the only thing I would say to supplement learning from this channel, is to try and link the information provided (usually from a biomechanics standpoint, in their videos); to the clinical presentations of the patients. Also, this channel works best as a revision tool, after you have read the topic.

It’s a little less detailed than you would need to get a thorough understanding of the topic, but if supplemented with some lecture notes and reading; can get you through a key topic smoothly. 

Top tip for this channel: Play at 1.5x speed, some of their narration is slower than necessary 🙂 

  1. AK Lectures

Although this channel features my initials, I assure you I am not biased. These videos have succinct explanations of complex topics [by which I mean: embryology], as well as biochemistry. Although the You-tuber’s delivery style itself can take a few minutes to adjust to, the detail and quality of the videos, is quite good – so do try and give it a chance. The range of content available is also what brings AK Lectures into 6th place, it’s quite impressive and well organised. 

Top tip for this channel: Just copy down what is on the board behind the presenter in the video, everything he talks through is basically on the board. Use this as a key points/concepts list to structure your learning of the topic. 

  1. Dr Matt and Dr Mike

This dynamic duo provides some excellent tutorials in key concepts of medicine. They score very well for delivery because the pace of the explanation is not too fast that you have to pause frequently, but not too slow that you feel the need to play it at faster speeds. These guys effectively synthesise complex information into short snippets or bullet summaries, the average videos being around 6-7 minutes, but they also supply some longer, more in-depth content of around 12-24 minutes. Leaving it up to you to decide how much/what level of video you have time for. And after all, every viewer likes the luxury of choice. 

This channel also has a good quality range of topics but more than that a lot of their content is focused on quite high yield content, meaning that whatever you end up watching is likely to end up being useful somewhere in the curriculum. 

Top tip for this channel: Their older videos and content are better than their more recent stuff 

  1. MedCram

This channel wins fourth place because of its course on how to understand electrocardiograms. Let’s be honest, those ECGs are hard to interpret and when the lecturer talks through it (especially if on Zoom/Blackboard) it can be hard to understand what they mean by the tiny bumps that supposedly represent P waves or T waves. 

In addition, most of the topics on this channel like understanding hypoxaemia, hyperkalaemia or hyponatremia are all made much more straightforward, so credit goes to this channel for simplifying things well. Also the content is very well linked to clinical conditions, which makes things easier when you get those clinical case based SBA questions, especially if things like Case of the Year assessments are to continue. 

Top tip for this channel: Commit to watching a whole playlist at once, this YouTuber builds on his points over the course of a collection of videos, so try to watch them consecutively if you have time. It helps consolidate the information better 

  1. Sam Webster

In relation to the previous post on this blog. This YouTube channel is the equivalent of the Golden ticket when it comes to anatomy teaching. You may not get to go to Willy Wonka’s factory, but the quality of explanations, linking to real life clinical signs and the bringing together of the muscular, nervous and skeletal system is second to none. I placed it third, because it is *only* anatomy. 

Sam Webster teaches anatomy at the University of Swansea, and does an excellent job of explaining the intricacies of the human body, in a way that doesn’t get boring.

Top tip for this channel: He uses a lot of anatomy lab models and pro-sections, so do try and watch his videos before you go to the anatomy lab. This will make it easier to draw the parallels between his content, your dissection and teaching on the topic. 

  1. Armando Hasudugan

This YouTuber is one of the best for quality of explanations and his diagrams are fantastic. With very well-thought out and sufficiently detailed explanations, these videos provide thorough explanations, which can then be reinforced by the lecture on that topic. Armando manages to cover most of the salient points in an efficient manner that gets the message across. If you’re not watching his videos already, would definitely recommend. They also aren’t too long and can easily be squeezed into a morning commute/walk to Cruciform. 

Top tip for this channel: I would say commit to really listening to these videos, not ones to rush through for a quick synopsis, these videos work much better to lay a grounding to start building your knowledge on. 

  1. Ninja nerd medicine

If you’re not watching these guys already, then you are living under a rock. Just kidding! Top quality content, detail and delivery. One of the best medical education channels on Youtube. Their videos are extremely detailed and cover physiology in a way that is genuinely interesting and entertaining. Maybe it’s the fact that Zach, the main presenter, is American and brings his gung-ho attitude to topics as mundane as the names of tubercles on bones; but it makes learning more exciting and if you haven’t watched them already, I would very highly recommend it! Hence its well deserved 1st place!

Top tip for this channel: Their videos are long, but commit to them, it’s worth it!

A Realistic Guide to Learning Anatomy in the Dissection Labs

Read time: 5 minutes

Em Lloyd (Year 4) and Vikram Thirupathirajan (Year 6) provide their advice on making the most of dissection lab sessions.

Anatomy can be a daunting subject. Not only is there a vast breadth of knowledge to learn (just look at the thickness of your Grey’s Anatomy for Students!), it can also be tricky to know how to make the most of your time in the dissection labs. In certain modules (Y2 MMB – we’re looking at you) you can have hours each week timetabled in the lab and it’s important that this time isn’t a waste for you.

One of the most effective ways to learn and remember anatomy is to be able to visualise it – anatomy dissections do just that. In addition to this, exams can include dissection images in your questions, so the more you engage, the more you’ll get out of it.

So, whether it’s your first time ever in the anatomy lab, or if you’re just looking to make the most of your next session, read on for our best advice on how to learn anatomy in the dissection room.

Set goals for each session

The dissection lab has an impressive variety of resources available for you to explore and learn from. This includes cadavers for group dissection, pro-sections, radiological images, models, and more. Some specific sessions will even have specialised equipment on offer that you can use to really apply your anatomical knowledge, such as endoscopes or ultrasound machines.

However, the huge range can be overwhelming as well as exciting. To help you stay focused and not feel lost, it’s a good idea to set goals for each session on what you want to learn and which resources you want to use. For example, “This session I will aim to dissect the anterior thoracic wall and look through some radiological images of the thorax”.

Each session is accompanied by a dissection guide on how to carry out the cadaveric dissection and which structures you should be able to identify. If you are unsure where to start with setting goals, begin by having a look at the dissection guide and decide on an aim for your cadaveric dissection. For example, “This session I will try to identify the structures of the brachial plexus.”  

Failing to prepare = preparing to fail

To be in the best position when you walk into the anatomy lab, you need to have at least a basic idea of what you’re about to dissect. Even ten minutes of preparation will help you to make the most of your session. So, we would recommend that you aim to read up on the relevant pages of the anatomy textbook and review the corresponding lecture. This means you don’t waste any precious time in the dissection lab and are instead able to spend that time applying your new knowledge to the cadavers and pro-sections. Of course, there are only 24 hours in the day and we know that it can be tricky to find time between all of your pre-clinical lectures and other commitments. At a minimum, gain some familiarity with the names of the structures you will be dissecting in that session

Learn the language

Practice using anatomical terminology, such as proximal, distal, superficial, deep, etc. You can apply this in everything you do, from interpreting images to talking through dissecting your cadaver with your group. By getting into the habit of using this fundamental terminology, it will become like second nature to you. And take it from two clinical year students – it will 100% help you when you get on the wards.

If you, like many of us, are someone who struggles to grasp new terminology immediately, make an active effort to learn it. Our best advice would be to bring a small notebook with you into the dissection lab so that you can make brief notes (technical tip: keep a separate pen to take to the dissection lab to avoid getting formaldehyde-laced pens and affecting your other note-taking) on any new content or terminology that you don’t understand. If you keep adding to your notes, it can act as a valuable revision resource that you can quickly review at the start of each dissection session. 

Work together

A great way to engage with your anatomy learning is to do it with someone else – whether that’s dissecting, or looking at pro-sections and models. Discussing things as you go encourages active rather than passive learning, and by working with a peer, you can quiz each other on specific structures and relations. Having a friend who you regularly work with also means that you can hold each other accountable for engaging with the session, and encourage one another when learning new topics. 

As well as your peers, you have the opportunity to engage with the anatomy demonstrators and near-peer tutors, or ‘blue coats’. Be proactive – ask them for their best tips to learn, or ask them to explain something that you’re not sure about. If an anatomy demonstrator comes over to actively quiz you, don’t fear this. It can feel daunting to directly answer questions when you’re not sure, but engaging with this is a fantastic way to learn. 

Don’t neglect pro-sections

The main focus of your anatomy laboratory sessions will obviously be the group dissection of your cadaver. However, it’s important to recognise that even with the most expert dissection, you won’t be able to identify everything. This is where pro-sections are invaluable to your learning – and there is a good chance that they will come up in your exams too. In particular, you should consider studying the pro-sections for your sessions on lung and heart anatomy, pelvis and posterior abdomen, skull base, and the pharynx. 

We would recommend that you pay attention to the announcements from the lead anatomy demonstrator at the start of the session – they will let you know what resources are available for you to use. Make sure you set aside some time during the session to study the pro-sections that are available; ideally, bring a friend along with you to quiz one another.

We hope that you have found this article helpful and that you are able to put some of our advice into practice in your next dissection session.

A New Year

A New Year

Happy new academic year and welcome to all first-year students (and anyone who has newly found our blog). If you’re new here, we are a group of UCL medical students providing a guide for making the most out of medical school through this blog: A Realistic Guide to Medical School, based on our own experiences.

As always, feel free to ask any questions or provide suggestions for future blog posts in the comments section. We are also starting up an emailing system. Sign-up here to receive email alerts from our blog, where we will email you with blog articles as they are released and also as relevant to your year and time of studies. Link: https://forms.gle/JkTzgnrZ29mKgCTF9 

As we enter the second year since the startup of our blog, we have sadly had to say goodbye to Anush, Jessica and Maddie, as they start a new exciting journey as FY1 doctors. At the same time, we are excited to introduce ourselves as the new team who’ll be maintaining and running the blog this year.

Meet the Team


Hi, I’m Anika and I’m a fourth-year medical student. I enjoy writing helpful tips about how to make the most of your time at medical school. Being from Liverpool, London seemed intimidating and intense at first, but I’ve grown to love it and the people I’ve met here. In my free time, I enjoy listening to music (no, not just the Beatles) and I am an avid badminton player.

I hope to dispel any common myths or worries about the course that you guys might have. Feel free to message me if you have any specific questions or concerns 🙂


My name is Em and I’m in my fourth year. I’m really excited to be part of the team and look forward to sharing my insights from my time at UCL so far! 

I hope that our blog will help to open up some of the ‘hidden curriculum’ of medical school. You may be wondering what the ‘hidden curriculum’ is; it’s the unwritten lessons that we learn, often unintended, alongside our official studies. Some of these are really helpful and potentially important for our future careers, like learning about what matters for specialty applications, or how to get the most out of your practical teaching. Unfortunately, others can be more insidious, such as seeing and eventually copying clinicians who follow poor infection-control practice. 

It’s really important to speak about our experiences and share them with one another so that we are all able to benefit. By sharing our ‘realistic’ advice, I hope that our blog will help you to get the most out of medical school, and prepare you for lectures, labs, clinical placements, and beyond.

I’m always happy to chat – drop me an email.


Hi! I’m Sujikka and I’m a Final year medical student. I can’t quite believe I’m reaching the end of medical school, but I’m excited to share the experiences I’ve had along the way and tips I wish I knew to make the most of your time here. Despite being a Londoner for most of my life (I was born in Norway), I enjoy trying out new food places and playing badminton in my spare time.

I hope you find our guide helpful and if you ever want to have a chat (medicine or non-medicine related) feel free to message me.


Hi! I’m Vikram, a Final year medical student. Despite having lived in five different parts of the world already, the last five years have still been a fresh and exciting mixture of ups and downs as I tried adapting (still am adapting in all honesty) to the university lifestyle. I’m excited to share some of my experiences with you in this guide and hopefully give you a few tips along the way. Outside of medicine I enjoy travelling, films, and most things coastal-side. Feel free to email any questions, concerns, or if you just want to have a chat.

A Realistic Guide to Applying to the UK Foundation Programme

Read time: 6 minutes

In this post, Maddie Wigmore-Sykes, a final-year medical student, breaks down the stages of the UK Foundation Programme (UKFP) application process.

Applying for my first job as a doctor filled me with equal parts excitement and dread. Navigating the UKFP website, working out where all the tabs were on Oriel and keeping up with the many deadlines can get a bit overwhelming. Never fear though, as here is our realistic (and slightly lengthy) guide to the UK Foundation Programme. Keep reading for further details on how to get each section done – dates provided are for 2022 starters!

For those of you who, like me, didn’t have a clue how any of this works, here’s a brief overview of the application process:

    • All foundation programme jobs in the UK are applied to via an online platform called Oriel
    • Your university nominates you at the start of your final year as eligible to apply for the programme and Oriel will contact you to create an account and fill in your relevant details for your foundation programme application
    • You can also choose to apply for an academic foundation programme (AFP) or a foundation priority programme (FPP) at this point (further blog posts on these incoming…)
    • In order to somehow stratify thousands of applicants, the UKFP uses the Situational Judgement Test (SJT), an ethics exam designed to “test the attributes needed to work as a foundation doctor”. Your SJT score gets combined with points you’ve accumulated from your decile and any additional academic qualifications for a grand score out of 100 (the good news is that you get 34 points for the medical degree – phew!)
    • As part of the application, you must rank where in the country you want to go for your first job
    • Oriel then matches you to an area based on your preferred locations, highest scorers first, and once you know where you’re going, you can rank the individual jobs – easy, right?

National Application Window (8th – 22nd September 2021)

It’s really important you don’t miss the deadline for national applications. This is where you will fill in all your details onto your Oriel account, including any additional qualifications or publications that may get you some extra points for 2022 entry (apologies to our 2023 starters who will be affected by UKFPO’s new guidance). Make sure to find your degree certificate early – you need to prove you have that iBSc!

The team at Oriel will then verify your additional educational achievements and provide you with an educational performance measure (EPM) score out of 50. For further information on how this works, check out the UKFP FAQs here.

SJT Booking Window (4th – 7th October 2021)

Another date to add to your diary is the deadline for SJT booking. You do this via the Pearson Vue website and can choose to sit the exam at a local Pearson Vue centre or at home with an online invigilator. You will be able to sit the SJT between 7th – 19th December 2021 and 18th – 23rd January 2022. 

Preparing for the SJT is difficult, it’s designed to be hard to revise for. There are official practice papers here, which give you an idea of the style and content the exam covers, which is mainly the contents of the GMC’s Good Medical Practice. Private SJT courses are advertised in the run-up to the exam, but these are by no means necessary to get a good score. Your SJT score gets scaled across the rest of the country into a mark out of 50 so is worth the same as your EPM score.

A further blog post on preparing for the SJT is in the works – watch this space!

Location Preferencing (deadline TBA – last year’s deadline 18th February 2021)

As part of the application process, you will have to pick your location preferences for where you want to work. For this, the UK is split into 20 different foundation schools, some as large as Wales and Scotland, while London and the surrounding area is split into three different schools. Deciding where you might like to start your career is really exciting; you might want to stay in the place you studied, move closer to home or try somewhere completely new.

Unfortunately some foundation schools are more competitive than others, so it’s worth ranking all the options just in case. The schools do release cut-off scores from previous years, but they tend to fluctuate so take them with a pinch of salt.

You have a lot of time to think about this, so don’t panic.

National Allocation (10th March 2022)

This is the day where you will find out where you’ll be working and Oriel will inevitably crash just as you’re about to log in. You’ll also get your SJT score so you’ll have more of an idea of how you’re ranked. It isn’t always good news for everyone, but there are excellent hospitals in all areas of the country and a lot of really good jobs!

The application process now changes slightly depending on which foundation school you have been allocated to. In the smaller areas with only a few hundred jobs to rank, you go directly into the programme preferencing stage, where you rank as many jobs as you want based on location and specialty. This requires either a complicated spreadsheet or a lot of flashcards. Bigger schools, such as South Thames and North West England, have a group matching stage first where you pick individual regions or trusts first. Once you’ve been matched to the smaller group, you can then rank the jobs as above from a much more manageable pool. 

For one-stage preferencing, the deadline is 31st March 2022. For two-stage preferencing, the group preferencing deadline is 16th March 2022 and the programme preferencing deadline is 31st March 2022.

Match to Programme Results (7th April 2022)

You’ll find out where you’ll be working and what specialties you’ll be doing and it will all suddenly feel very real! Most programmes have a really good mix of surgical, medical and community placements so whatever you end up with, you’ll get some great experience.

Good luck with your applications and let us know if you have any questions in the comments!

The Best Apps That Will Save You on the Wards

Read time: 3 minutes

In this article, Anush, a final-year medical student, discusses some of the best apps you can use while you’re on the wards.

MDCalc

MDCalc Medical Calculator Review | Educational App Store

“Can you do an AMTS on this patient?”
“Can you check Wells’ score the patient in bed X?”

MDCalc let’s you pull out any of the millions of scoring systems used in hospitals up on your phone. Gone are the days of looking confused as you struggle to remember all the components of a score in front of a patient.

The Official BNF AppGet ready for the improved BNF app | BNF Publications

Do you ever forget the doses of certain medications? Do you ever blank on the important side effects or interactions?

If you answered yes to either of these questions, the official BNF app will definitely help you out!

Much more easier to navigate than the ye olde physical BNF book, you can easily search for the drug you’re looking for. You can even list several drugs if you’re worried that some are interacting!

MicroGuide

Antibiotic stewardship is a hugely important part of medical practice. With the rise in resistant organisms such as MRSA, ensuring we give appropriate antibiotics based on the source of the infection and local sensitivities is key.

This is why antibiotic guidance varies so much between trusts! Luckily for us, we can easily check the local guidance using MicroGuide – download the app, go to “Get Guides” and find the trust you’re placed to get started!

Induction

Ever asked if you could ring microbiology to chase some cultures? Or wish you knew how to bleep the F1 you’re meant to be shadowing but just can’t find.

Induction is one of the most useful tools – it effectively acts as a directory for all of the registered bleeps and phones for the hospital, so you can quickly contact whoever you need. In addition to these, it allows you to ring hospital phones from your own mobile. Very convenient!


A Realistic Guide to Teaching as a Medical Student

Read Time: 6 minutes

Vikram Thirupathirajan (Y5, Education Officer for UCL Surgical Society) provides his views on the benefits of teaching at medical school and how to get involved in teaching as a medical student.

As a doctor, you will be a teacher- regardless of what specialty you go into. No matter what stage of your career you are at, part of your role will be to conduct some form of teaching to those in an earlier stage of the career to you. So it does not come as a surprise when teaching forms one of the highest-scoring criteria for a medical portfolio. 

In addition to helping with your portfolio, teaching, particularly as a medical student, has several other benefits attached to it.

Teaching is the highest form of learning

This is a unique benefit for teaching as a medical student, as medical school is a key time when you will be learning some core concepts that will stick with you for life. There is scientific evidence to suggest that teaching someone else about a particular topic is arguably the best way of retaining information, which makes sense if you think about it- in order to be able to teach someone something, you will have learnt that something to a high standard yourself. Especially in a course where what you are taught will be needed for life, being involved with teaching will help you consolidate that knowledge for yourself as you teach it to others.

Starting early sets you up for life

In a profession where teaching is incredibly prevalent, being able to master the skills early is very useful. What better place to start, than at medical school itself? This is the place where what you teach, and the skills required will be most transferable to when you teach as a doctor. 

You become an organised medical student

Teaching at medical school is on the whole, voluntary, and requires extra time to do it. Naturally, setting aside time for teaching, particularly if you are organising the teaching yourself, will help you learn how to prioritise and how to schedule. This will in turn make you organise your own studying and you’ll notice yourself becoming more productive and efficient.

Getting into teaching as a medical student

Have I convinced you enough to get into teaching? UCLMS offers a wealth of opportunities for medical students to undertake teaching at medical school.

Join a student society

This is one of the easiest ways to get involved in teaching. This is a very good starting point to get a flavour of what teaching as a medical student is like. You can then build on this afterwards to take up roles in education subcommittees in the society and/or onto the main committee as the education lead for the society. Taking up such roles will enable you to organise and introduce widely recognised teaching across the medical school. AGMs are currently upcoming this month so if a committee role interests you, do consider applying. Applications to be a tutor for events vary in terms of when they go live, so do keep an eye out for updates, or contact the society’s education lead.

Most sports clubs, in addition to UCL Medical and Surgical Societies conduct teaching for younger year students. For preclinical year students, Medical Society tends to teach physiology-related topics, while Surgical Society teaches anatomy topics. Sports clubs will conduct more informal teaching on all topics. For clinical years, most societies will conduct teaching on all things clinical medicine and surgery.

Set up your own teaching

Alternatively, you can independently start up your own teaching series on your own or together with a few other medical students (I would recommend the latter). Whilst getting a wide reach with this may take longer to achieve (but it definitely will happen given the age of social media), you have more freedom and flexibility in when you start, what you teach and can truly make it your own thing.

Setting up your own teaching or being on a committee role for education also gives you the opportunity to try and introduce something new- embrace this! Whilst teaching the same topics in the same way is good to reinforce memory, it can limit you to what you teach. Therefore, look for gaps; if a particular topic isn’t taught very well, focus on that. Alternatively, try a different approach to teaching something. For example, some students in the past have taught by the traditional method of going through each topic one at a time, whilst others have approached it as a case-scenario. Trying different ways offers a new perspective to learning content, which is very useful given that medicine is such an evolving field. Furthermore, introducing innovative teachings can form a basis for research or audits.

Teaching with the medical school faculty

The medical school themselves also have opportunities available for teaching. Notably is the Anatomy Lab Near Peer Tutor (the Blue-coats). Agreed, the anatomy lab is on hold at the moment due to the current climate, but it is something that definitely will return. This opportunity is available for third year medical students and involves being student tutors to help teach and answer any questions that students in years one and two have about their anatomy dissection and related topics during their Anatomy Lab sessions. Information about this releases in the last week before the start of the new academic year- the medical school will email you themselves. 

On a university-wide scale is the Transition Mentor Scheme. This involves mentoring students in their first year, part of which involves teaching. Student societies are increasingly adopting mentoring systems; mentoring is a brilliant way if you would like to be involved in widely recognised teaching but would like the freedom in choosing and organising what you would like to teach. Applications for this also open in term 3.

Though less traditional forms of teaching, the medical school’s education faculty also have numerous projects on offer. Examples of such projects include being question authors for formative exams, being involved in student Q&A and teaching for formative exams you helped write etc. Why, this very blog itself is a project from the medical school’s education faculty. Again, this will be widely recognised by the medical school, who will commend your work as necessary with certificates. Arguably more importantly, you will build contacts with the medical school faculty, get further opportunities and much better insights into the workings of your MB BS course. If you are interested in being involved in a project, let either myself, Anush, Jess or Maddie know and we can direct you appropriately.

Creating the future doctors 

This is the reason why the idea of teaching exists to begin with- to pass on your knowledge to future generations. Medicine is a subject where being accurate and competent is important, and so younger-year students gaining insight into what you learnt and how is crucial. In fact, students will most relate to you, the older year medical students, because what you have experienced will be very similar to what they experience, and so you will be able to relate to students’ challenges best.

Therefore, by getting involved in teaching, you play a part in cultivating the next cohort of competent medical students and future doctors, both a huge accomplishment and honour.

Top 10 Tips: Getting into Research as a Medical Student

Read time: 8 minutes

Introducing our new series: Top 10 Tipsa simple guide to help you achieve your goals!

In this blog post, Jessica Xie (final year UCL medical student) shares advice on getting into research as a medical student.

Disclaimers: 

    • Research is not a mandatory for career progression, nor is it required to demonstrate your interest in medicine. 
    • You can dip into and out of research throughout your medical career. Do not feel that you must continue to take on new projects once you have started; saying “no, thank you” to project opportunities will allow you to focus your energy and time on things in life that you are more passionate about for a more rewarding experience.
    • Do not take on more work than you are capable of managing. Studying medicine is already a full-time job! It’s physically and mentally draining. Any research that you get involved with is an extracurricular interest.

I decided to write this post because, as a pre-clinical medical student, I thought that research only involved wet lab work (i.e pipetting substances into test tubes). However, upon undertaking an intercalated Bachelor of Science (iBSc) in Primary Health Care, I discovered that there are so many different types of research! And academic medicine became a whole lot more exciting…

Here are my Top 10 Tips on what to do if you’re a little unsure about what research is and how to get into it:

TIP 1: DO YOUR RESEARCH (before getting into research)

There are three questions that I think you should ask yourself:

    1. What are my research interests?

Examples include a clinical specialty, medical education, public health, global health, technology… the list is endless. Not sure? That’s okay too! The great thing about research is that it allows deeper exploration of an area of Medicine (or an entirely different field) to allow you to see if it interests you.

2.  What type of research project do I want to do?

Research evaluates practice or compares alternative practices to contribute to, lend further support to or fill in a gap in the existing literature.

There are many different types of research – something that I didn’t fully grasp until my iBSc year. There is primary research, which involves data collection, and secondary research, which involves using existing data to conduct further research or draw comparisons between the data (e.g. a meta-analysis of randomised control trials). Studies are either observational (non-interventional) (e.g. case-control, cross-sectional) or interventional (e.g. randomised control trial).

An audit is a way of finding out if current practice is best practice and follows guidelines. It identifies areas of clinical practice could be improved.

A quality improvement project (QIP) involves planning and implementing an improvement strategy, assessing if it improves outcomes or patient care and seeing how things could be further improved. QIPs follow the Plan, Do, Study, Act cycle.

Another important thing to consider is: how much time do I have? Developing the skills required to lead a project from writing the study protocol to submitting a manuscript for publication can take months or even years. Whereas, contributing to a pre-planned or existing project by collecting or analysing data is less time-consuming. I’ll explain how you can find such projects below.

3.  What do I want to gain from this experience?

Do you want to gain a specific skill? Mentorship? An overview of academic publishing? Or perhaps to build a research network?

After conducting a qualitative interview study for my iBSc project, I applied for an internship because I wanted to gain quantitative research skills. I ended up leading a cross-sectional questionnaire study that combined my two research interests: medical education and nutrition. I sought mentorship from an experienced statistician, who taught me how to use SPSS statistics to analyse and present the data.

Aside from specific research skills, don’t forget that you will develop valuable transferable skills along the way, including time-management, organisation, communication and academic writing! 

TIP 2: BE PROACTIVE

Clinicians and lecturers are often very happy for medical students to contribute to their research projects. After a particularly interesting lecture/ tutorial, ward round or clinic, ask the tutor or doctors if they have any projects that you could help them with! 

TIP 3: NETWORKING = MAKING YOUR OWN LUCK

Sometimes the key to getting to places is not what you know, but who you know. We can learn a lot from talking to peers and senior colleagues. Attending hospital grand rounds and conferences are a great way to meet people who share common interests with you but different experiences. I once attended a conference in Manchester where I didn’t know anybody. I befriended a GP, who then gave me tips on how to improve my poster presentation. He shared with me his experience of the National institute of Health Research (NIHR) Integrated Academic Training Pathway and motivated me to continue contributing to medical education alongside my studies.

TIP 4: UTILISE SOCIAL MEDIA

Research opportunities, talks and workshops are advertised on social media in abundance. Here are some examples:

Facebook

Search “medical student research” or “medsoc research” into Facebook and lots of groups and pages will pop up, including UCL MedSoc Research and Academic Medicine (there is a  Research Mentoring Scheme Mentee Scheme), NSAMR – National Student Association of Medical Research and International Opportunities for Medical Students.

Twitter

Search #MedTwitter and #AcademicTwitter to keep up to date with ground-breaking research. The memes are pretty good too.

LinkedIn

Opportunities are harder to come by on LinkedIn, since fewer medical professionals use this platform. However, you can look at peoples’ resumes as a source of inspiration. This is useful to understand the experiences that they have had in order to get to where they are today. You could always reach out to people and companies/ organisations for more information and advice.

TIP 5: JOIN A PRE-PLANNED RESEARCH PROJECT

Researchers advertise research opportunities on websites and via societies and organisations such as https://www.remarxs.com and http://acamedics.org/Default.aspx

TIP 6: JOIN A RESEARCH COLLABORATIVE

Research collaboratives are multiprofessional groups that work towards a common research goal. These projects can result in publications and conference presentations. However, more importantly, this is a chance to establish excellent working relationships with like-minded individuals.

Watch out for opportunities posted on Student Training and Research Collaborative.

Interested in academic surgery? Consider joining StarSurg, BURST Urology, Project Cutting Edge or Academic Surgical Collaborative.

Got a thing for global health? Consider joining Polygeia

TIP 7: THE iBSc YEAR: A STEPPING STONE INTO RESEARCH

At UCL you will complete an iBSc in third year. This is often students’ first taste of being involved in research and practicing academic writing – it was for me. The first-ever project that I was involved in was coding data for a systematic review. One of the Clinical Teaching Fellows ended the tutorial by asking if any students would be interested in helping with a research project. I didn’t really know much about research at that point and was curious to learn, so I offered to help. Although no outputs were generated from that project, I gained an understanding of how to conduct a systematic review, why the work that I was contributing to was important, and I learnt a thing or two about neonatal conditions. 

TIP 8: VENTURE INTO ACADEMIC PUBLISHING

One of the best ways to get a flavour of research is to become involved in academic publishing. There are several ways in which you could do this:

Become a peer reviewer. This role involves reading manuscripts (papers) that have been submitted to journals and providing feedback and constructive criticism. Most journals will provide you with training or a guide to follow when you write your review. This will help you develop skills in critical appraisal and how to write an academic paper or poster. Here are a few journals which you can apply to:

Join a journal editorial board/ committee. This is a great opportunity to gain insight into how a medical journal is run and learn how to get published. The roles available depend on the journal, from Editor-in-Chief to finance and operations and marketing. I am currently undertaking a Social Media Fellowship at BJGP Open, and I came across the opportunity on Twitter! Here are a few examples of positions to apply for:

TIP 9: GAIN EXPERIENCE IN QUALITY IMPROVEMENT

UCL Be the Change is a student-led initiative that allows students to lead and contribute to bespoke QIPs. You will develop these skills further when you conduct QIPs as part of your year 6 GP placement and as a foundation year doctor.

TIP 10: CONSIDER BECOMING A STUDENT REPRESENTATIVE

You’ll gain insight into undergraduate medical education as your role will involve gathering students’ feedback on teaching, identifying areas of curriculum that could be improved and working with the faculty and other student representatives to come up with solutions. 

It may not seem like there are any research opportunities up for grabs, but that’s where lateral thinking comes into play: the discussions that you have with your peers and staff could be a source of inspiration for a potential medical education research project. For example, I identified that, although we have lectures in nutrition science and public health nutrition, there was limited clinically-relevant nutrition teaching on the curriculum. I then conducted a learning needs assessment and contributed to developing the novel Nutrition in General Practice Day course in year 5.

Thanks for reaching the end of this post! I hope my Top 10 Tips are useful. Remember, research experience isn’t essential to become a great doctor, but rather an opportunity to explore a topic of interest further.

Jess


A Realistic Guide to Surgical Rotations

Read time: 3 minutes

In this post, Ritika Gera, a fifth-year medical student, gives some tips and tricks for making the most of your surgical rotation.

Starting a surgical rotation can feel challenging and scary! It’s normal to feel overwhelmed in an unknown situation, and theatres are like walking into an entirely different universe with new rules to navigate. However, theatres can also be a great learning experience and feel really enjoyable. To help you make the best of your time in surgery, here are some top tips:

Tip 1: Know a little about a lot (not a lot about a little)

No-one expects you to be an expert in any specific operation, so don’t spend hours and hours pre-reading. A general rule of thumb is to know 2-3 sentences of information about any procedure which you can use to show your understanding. It’s also useful to look up indications for and complications of the procedure to illustrate a holistic understanding.

Tip 2: Don’t panic about anatomy!

Try to have a basic understanding of relevant anatomy; much like your pre-clinical anatomy labs, things will make a lot more sense when you have some background knowledge. However, please remember you don’t need to know anatomy at the same expansive level expected in pre-clinical study!

You should revise anatomy which is clinically relevant and links to particular pathology/presentations. For example, you should know the path of the axillary nerve because it’s more likely to be damaged in a fracture of the surgical neck of the humerus. Being able to correlate this information with your knowledge about the function of the posterior cord of the brachial plexus is extremely valuable in clinical practice.

Tip 3: Early is on time, on time is late

Ideally, try to arrive at your theatres slightly earlier than timetabled, so you can accompany the surgical team on their preoperative rounds and clerk a patient. Once a procedure starts it can be difficult to enter theatres so always aim to arrive 5-10 minutes ahead of schedule!

Tip 4: You miss 100% of the shots you don’t take

Ask to scrub in and assist and don’t expect the surgeon to offer. It’s important to clearly state what you need from the session; even if you can’t do much to assist, scrubbing in is a key clinical competence which is important to practice.

Tip 5: Always ask for help when you need it

It’s vital to always ask for help as and when you need it; when it comes to scrubbing in and assisting, no-one expects you to get it right on the first try! Remember the team you’re with once had a ‘first day’ of their own, and if you ask for help, they will understand and do their best to assist you.

Theatres can be a fantastic learning experience for medical students. It’s an opportunity to see things you’ve spent years studying come to life in front of you. You learn valuable skills along the way, such as how operative emergencies are dealt with safely and effectively, and you are exposed to the realities of being a surgeon. Use the opportunity to ask questions, not just about medicine, but about what surgeons’ lives are like; this is vital for figuring out if surgery is something you want to pursue. As with any rotation, to make the most of it, it’s important to be proactive, keen to learn, and enthusiastic to help.


Please sign in first
You are on your way to create a site.