4. Running Reports
Having made a disk image, I now wanted to make use of BitCurator’s Forensics and Reporting function. The disk image is in an E01 file that can’t actually be opened on BitCurator itself, although there is software out there to facilitate this. Running reports is a way of reading the raw data of the disk image and finding features of potential interest.
Bulk Extractor
I found that creating readable reports is essentially a two-step process. First, you run bulk_extractor on your disk image, then use the outcome of this action to create high-level reports on the contents of your disk.
I opened up the Forensics and Reporting folder and then loaded the BitCurator reporting tool and, again following the Quick Start guide, launched bulk_extractor, selecting my disk image and a folder I’d created for the outcome of this process:
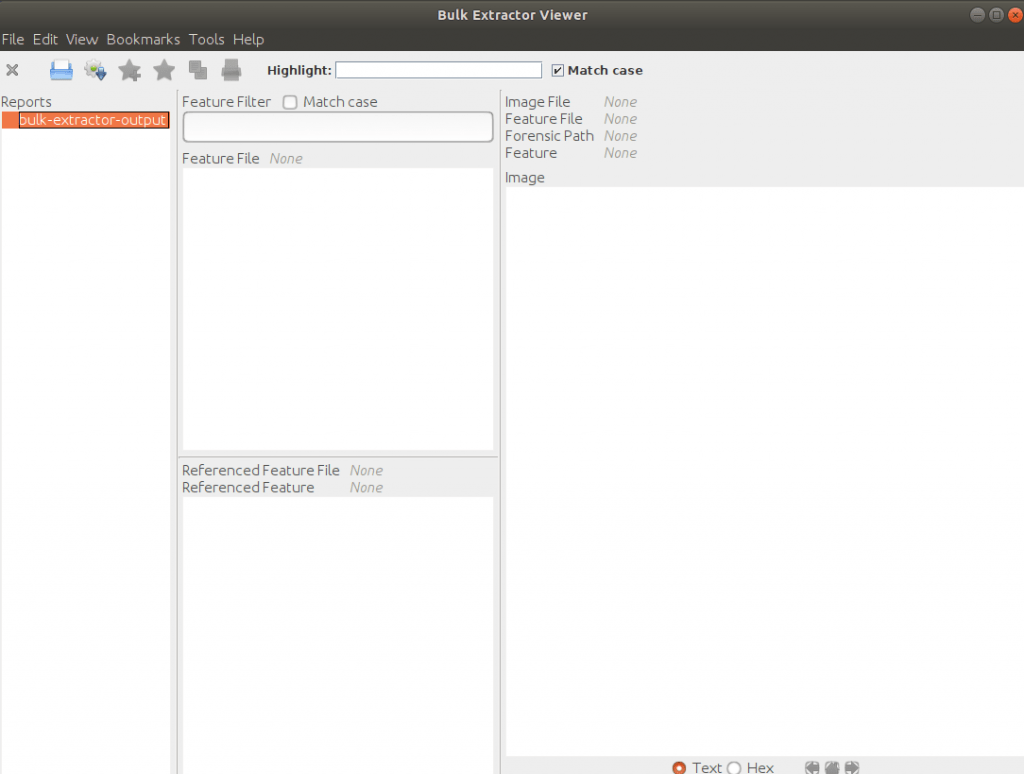
The Quick Start guide warned that this process may take a while. Mine, however, was instantaneous, and when I went into the bulk_extractor viewer, where I expected to be greeted with a sequence of unintelligible characters denoting the successfully created reported, I instead found…absolutely nothing.

Expectations (a screenshot of the ‘viewing the bulk_extractor report’ slide of the BitCurator Quickstart guide)…
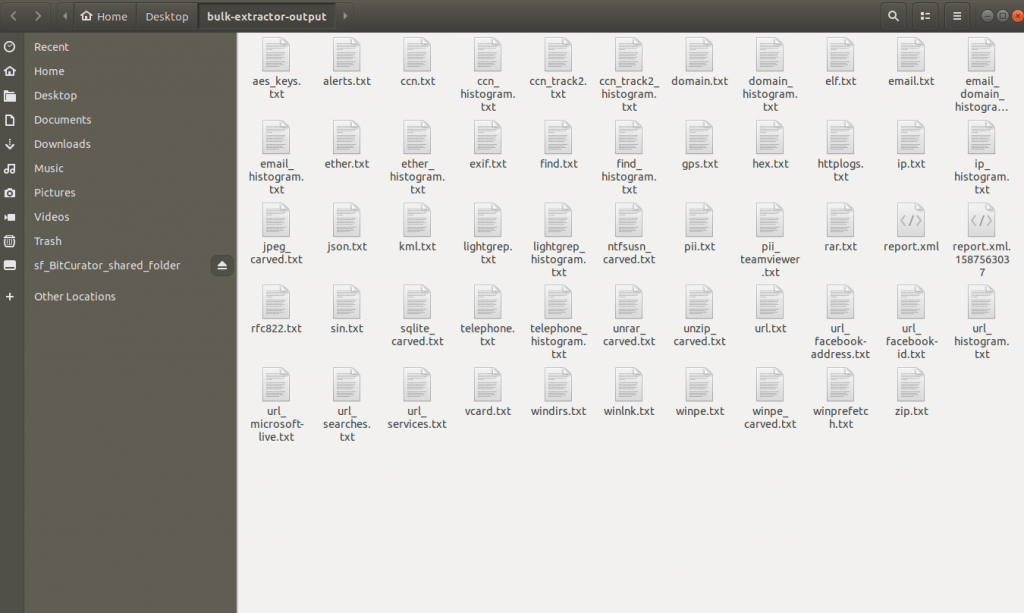
However, when I went into the bulk_extractor output folder I had created, there was clearly something there:
Undeterred and feeling optimistic, I decided to simply continue on with the reporting process. Nothing ventured, nothing gained!
Creating Readable Reports
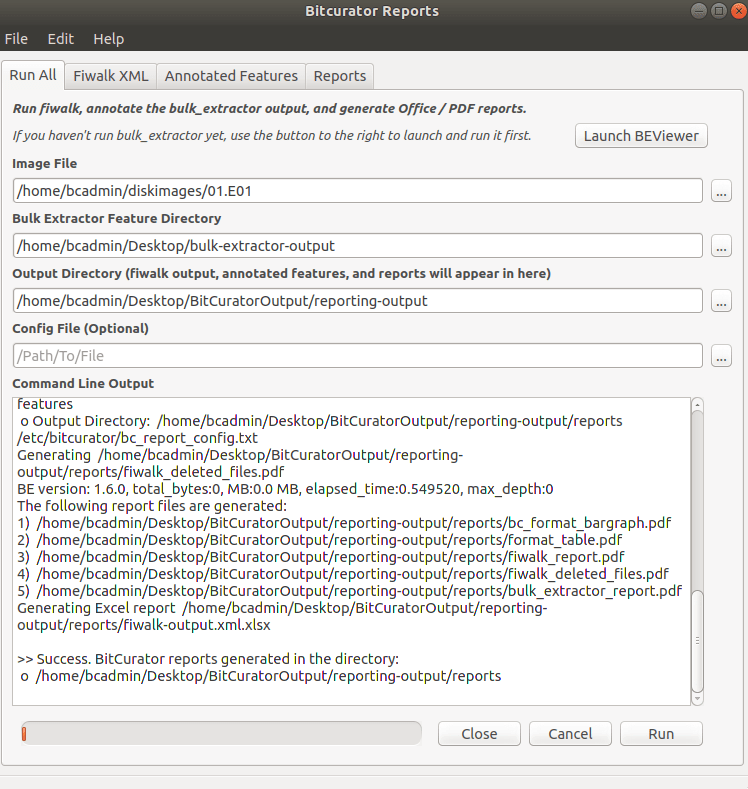
The next steps was to go back into BitCurator Reports, go to the ‘Run All’ tab, and select my disk image as the image file, the bulk_extractor output I had just created as the Bulk Extractor Feature directory, and then a new folder for the output of this process. Then, I hit ‘Run’, crossed my fingers, and within a few seconds the process was complete:
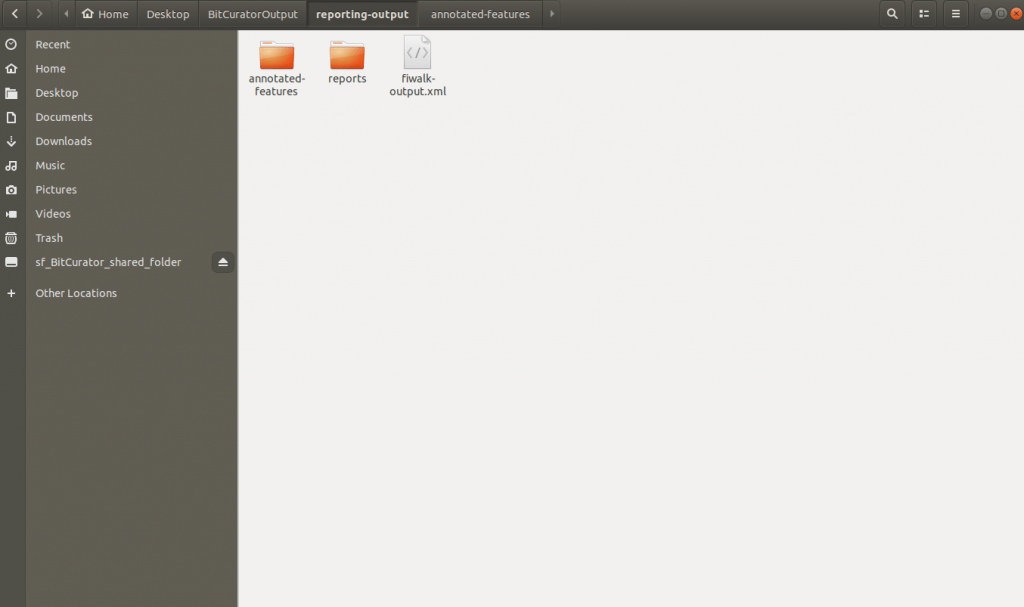
Going into my reporting output folder, there was something there!
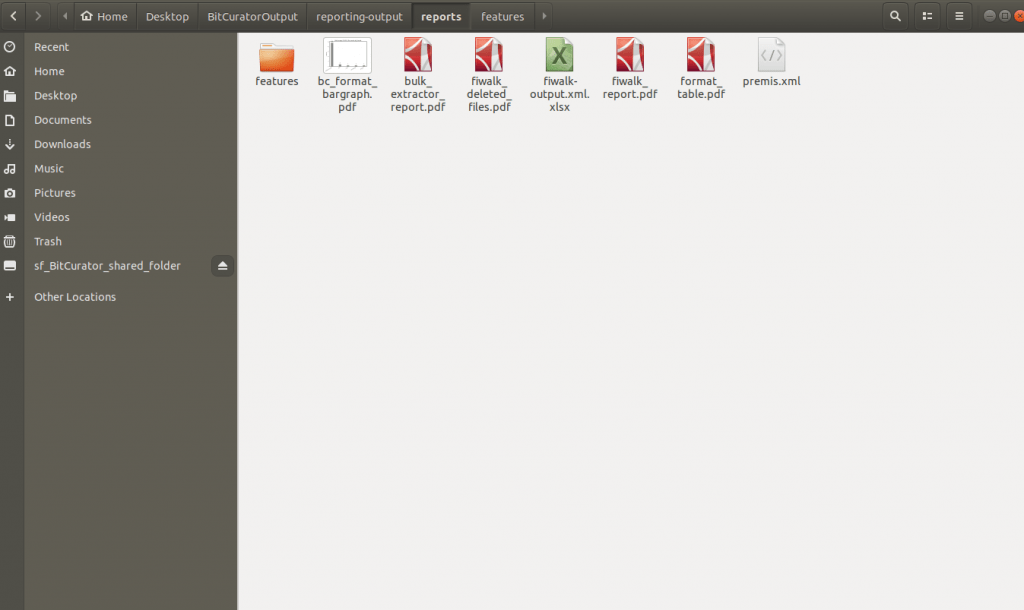
In the ‘reports’ folder, I found just what I had hoped for; a series of readable reports on my disk image.
This just goes to show that sometimes it’s best to fully explore a process rather than let your own doubt derail it prematurely!
Looking at the Reports
The QuickStart guide lists the seven reports as follows:
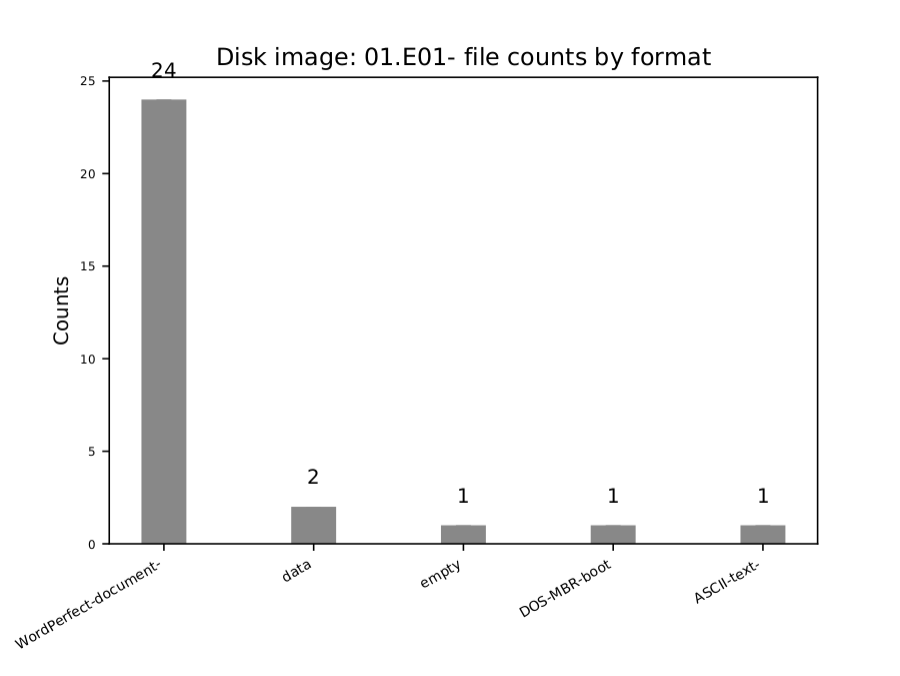
- bc_format_bargraph.pdf – file format histogram
- bulk_extractor_report.pdf – high-level overview of feature locations on disk
- filewalk_deleted_files.pdf – shows paths to any deleted materials found in a given partition
- fiwalk-output.xml.xlsx – Excel version of the DFXML output (file system metadata)
- fiwalk_report.pdf – high-level overview of file system characteristics
- format_table.pdf – long-form file format names for formats shown in a bar graph
- premis.xml – PREMIS preservation metadata
My floppy disk contained only a small number of files, so the information gathered in these reports wasn’t particularly extensive; the reporting output for a larger disk, say a PC hard drive, would be much denser. Nonetheless, I was able to glean some interesting information from a number of the reports.
1. Confirmation of the types of files on the disk
I noted earlier that the disk had been labelled ‘WORD PERFECT FILES’, leading to an assumption of the kinds of files contained on it. However, mounting the disk in BitCurator revealed files with many different extensions, most of which I had never heard of. The reports confirm that the disk’s files were created on WordPerfect. DOS-MBR-boot refers to a file on the disk that every hard disk has built-in as a way of structing the files and data it contains. MBR stands for ‘master boot record’, and DOS refers to an operating system that pre-dates Windows (but also went on to integrate with it). Even this small piece of information in regards to the operating system the files were likely created within provides a historical context to the digital material that we may not have gleaned otherwise.
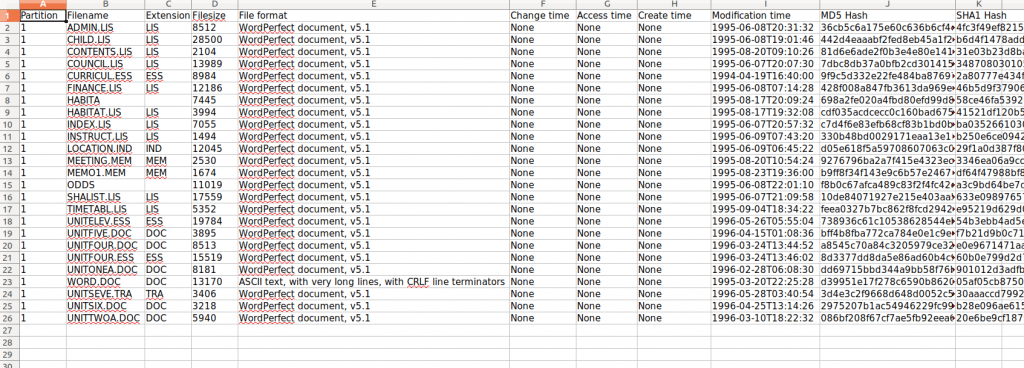
2. A spreadsheet with file types, names of files, dates of modification, and hash values
This spreadsheet is perhaps the most useable and accessible way of parsing information on the files contained on the disk: it shows the file name, type, and extension. It also identifies which file is the ASCII text (essentially a plain text file that can be read by any platform or operating system) from the bar graph.
The spreadsheet also includes MD5 and SHA1 hash values for each individual file. Having the hash values in a spreadsheet allows you to quickly search for duplicates files; if two hash values are the same, the files themselves are identical!
Also shown is the last modification date and time of each file – more interesting historical info, although it is difficult to know what action ‘modification’ pertains to. Frustratingly, no creation date or time has been preserved; this is likely because, unlike word processing packages today, WordPerfect wouldn’t have automatically recorded the date of creation, so if one wasn’t input, it wasn’t kept.
3. PREMIS preservation metadata
PREMIS (Preservation Metadata Implementation Strategies) is a a metadata standard, hosted by the Library of Congress, for recording information required for preservation of digital objects. The metadata recorded here is about the BitCurator reporting process itself. A crucial part of digital curation is ensuring that every stage of the preservation process is recorded and accounted for; this metadata acts as a record of the actions done to the floppy disk, which is important for maintaining the authenticity of the disk image as a digital object.
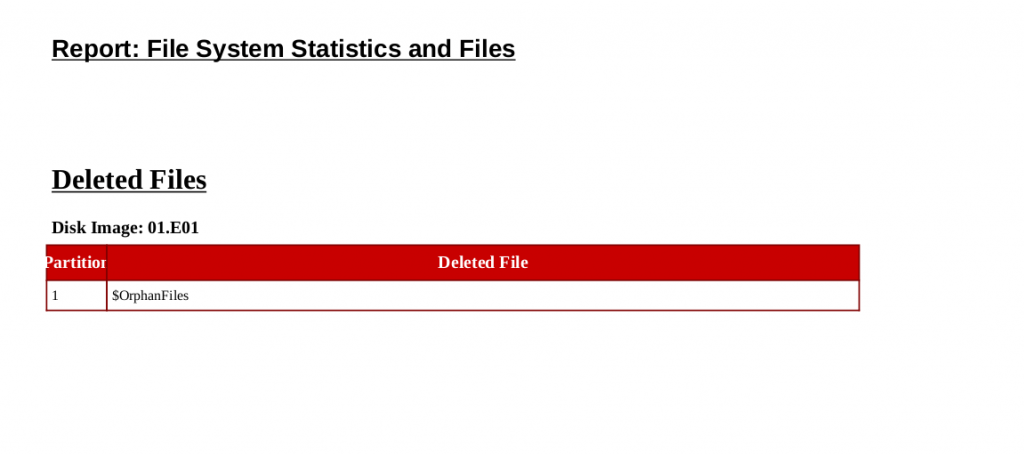
4. A deleted file
Some real digital forensics! The report identified a file that had been previously deleted from the floppy disk. An orphan file isn’t anything too interesting, but it was exciting to see BitCurator pull up a bit of the digital object’s invisible past.
Now, it’s time to move onto the final stage in my process; wrapping up the digital object with all the data I had generated about it into an easily transferable ‘bag’ of information.



Leave a Reply