3. Taking a Disk Image
Wait…what is a disk image and why is important?
A disk image is a single file that contains an exact digital replica of a piece of a data storage device, for example a USB, a CD-ROM, a floppy disk, or a hard drive. Unlike simply copying files off of a storage device, disk images preserve all metadata from the original file system; sometimes, this can include entire operating systems.
Disk images have multiple uses within the framework of digital archiving practice. For an archivist, a disk image can:
- Allow archive users and researchers to explore the original material stored by the imaged format without risking altering the data.
- Assist in preservation efforts by protecting against the physical failure of the storage medium.
- Improve understanding of the provenance of the digital object by recording lost or hidden files and data.
Essentially, disk images preserve massive amounts of metadata that would be lost by simply copying files off of a physical storage medium into a digital repository. As archivists, we are essentially concerned with maximising our understanding of the records that we keep and making this understanding available to archive users; a disk image is a tool that allows us to do this with born-digital material.
Creating a disk image
To make my disk image, I followed pages 24-32 of the Bitcurator Quickstart Guide, and also a guide to using BitCurator for working with 3.5″ floppy disks written by Melanie Wisner at Harvard Library, both of which helped to break the process down into manageable steps.
1. I had borrowed a USB portable disk drive from my course tutor, which you can buy online cheaply and that offers a really quick and fool proof way of at least being able to view the contents of a floppy disk.
At this stage you would ideally want to use an external USB write blocker such as this one to help prevent any changes being made to the digital material by mounting it to your PC. I don’t have access to this kind of write blocker, so I’m going to continue without, but if you’re undertaking a comparable project based on this blog know that this is the point in which you would use an external write blocker! Dorothy Waugh’s paper A Dogged Pursuit: Capturing Forensic Images of 3.5″ Floppy Disks has a useful breakdown of different approaches to using write blockers in this type work on pages 4-13 for a more in-depth exploration of this topic.
Having connected the disk drive to my PC I used the BitCurator environment to view the files on the floppy disk:
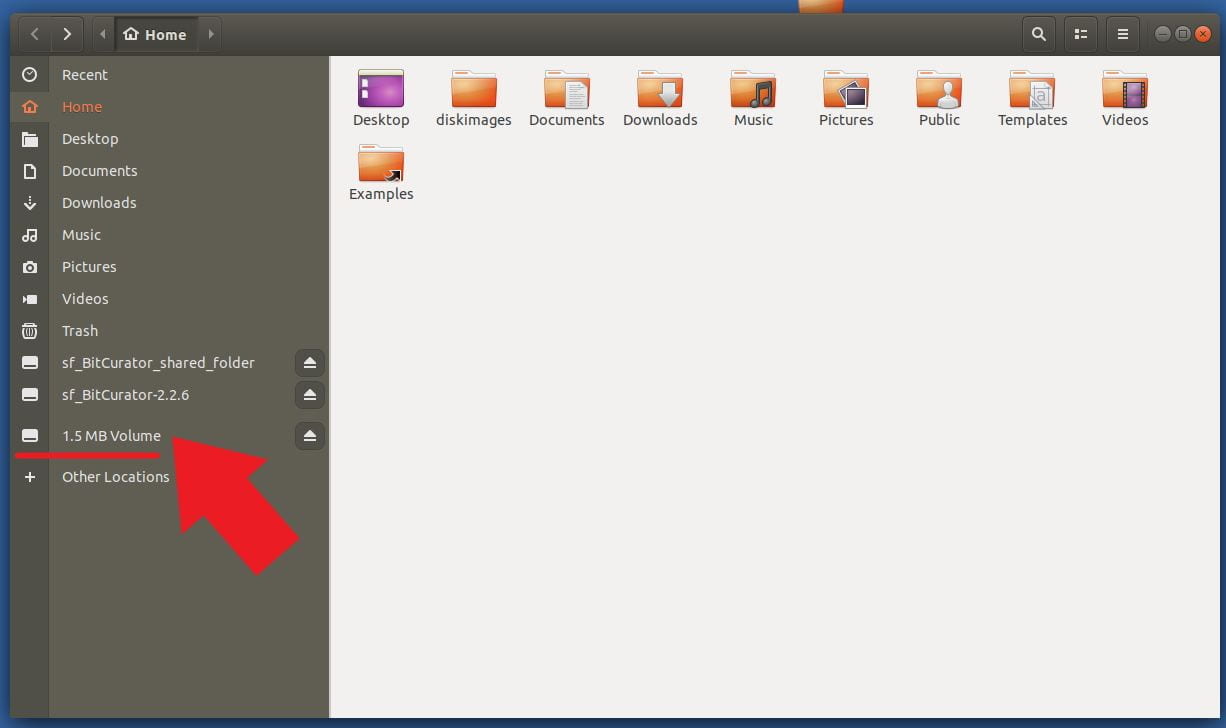
The USB disk drive appearing in BitCurator
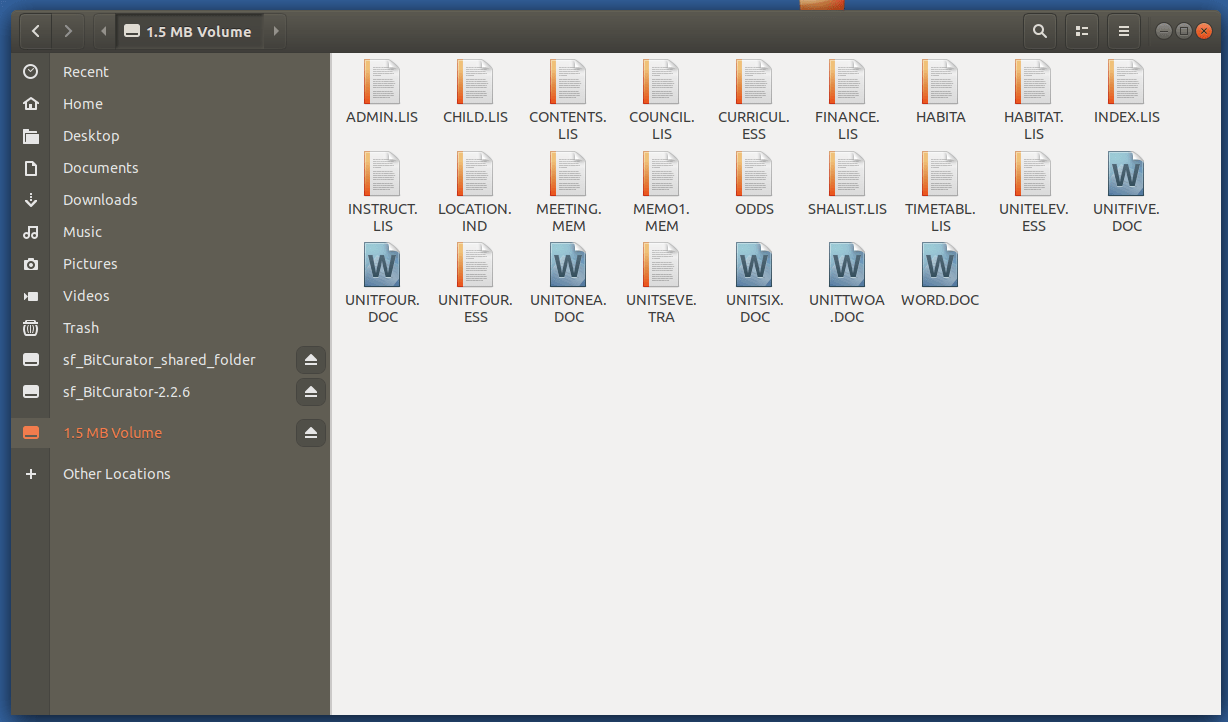
The floppy disk’s files revealed!
Now, I was able to see the contents of the floppy disk for the first time. Immediately I am greeted by a host of unusual file extensions – .LIS, .MEM, .ESS, .TRA and .IND, along with the more recognisable .DOC, and some files that have no extension at all.
2. Next, I opened up Guymager in the ‘Imaging and Recovery’ folder, where you see a list of lots of running devices. I identified the floppy disk based on the device size, right clicked, and selected ‘acquire image’.
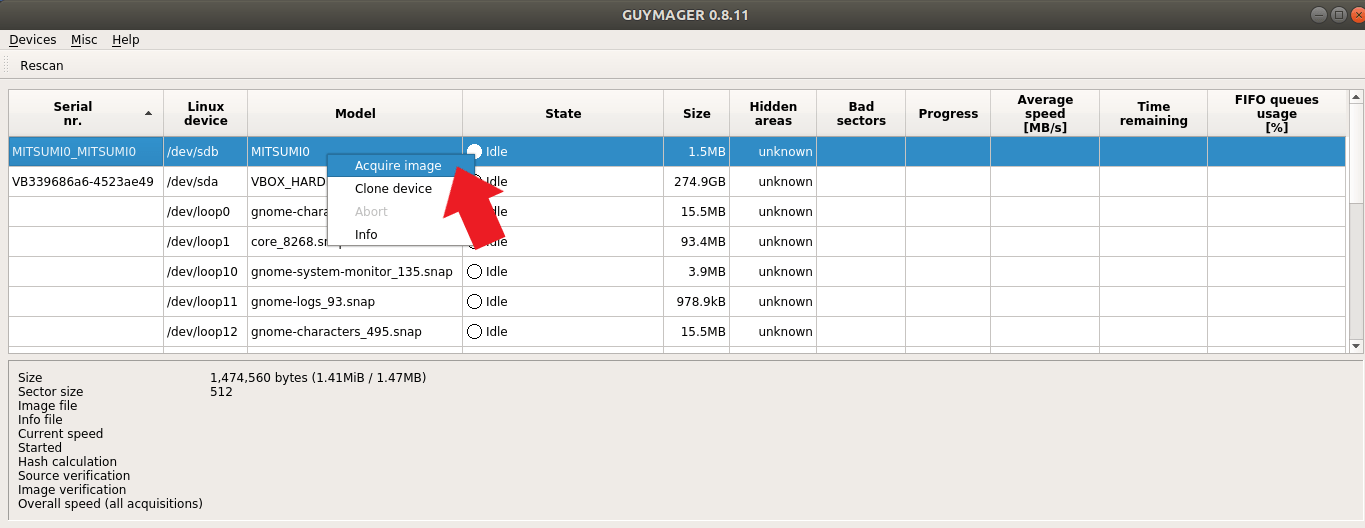
A screenshot of the floppy disk in Guymager
3. From here, a screen appears in which you fill out some metadata and choose where to save the disk image (I had made a folder in BitCurator called ‘diskimages’ for this purpose). Part of my workflow was also to generate a checksum – a digital fingerprint that is used to detect any changes made to a file throughout the forensics process – so I selected all of the ‘hash calculation/verification’ options at the bottom of this window:
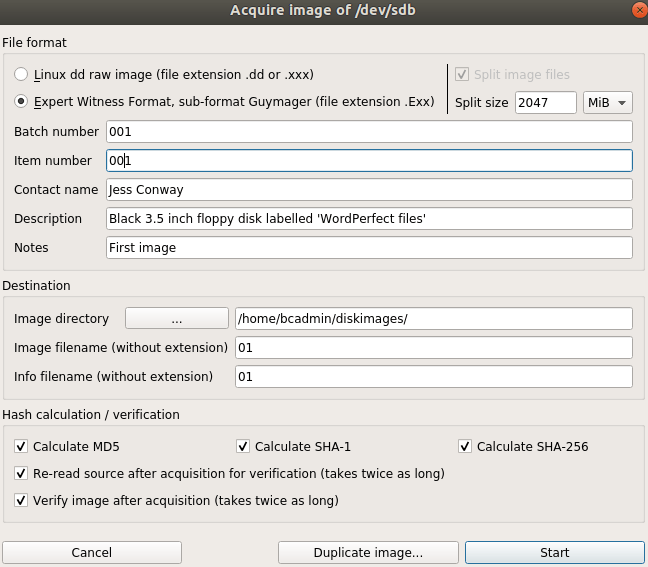
The completed metadata screen
4. Then, press ‘Start’, and hunch nervously over your computer for the two or three minutes it takes for the image to be made until:
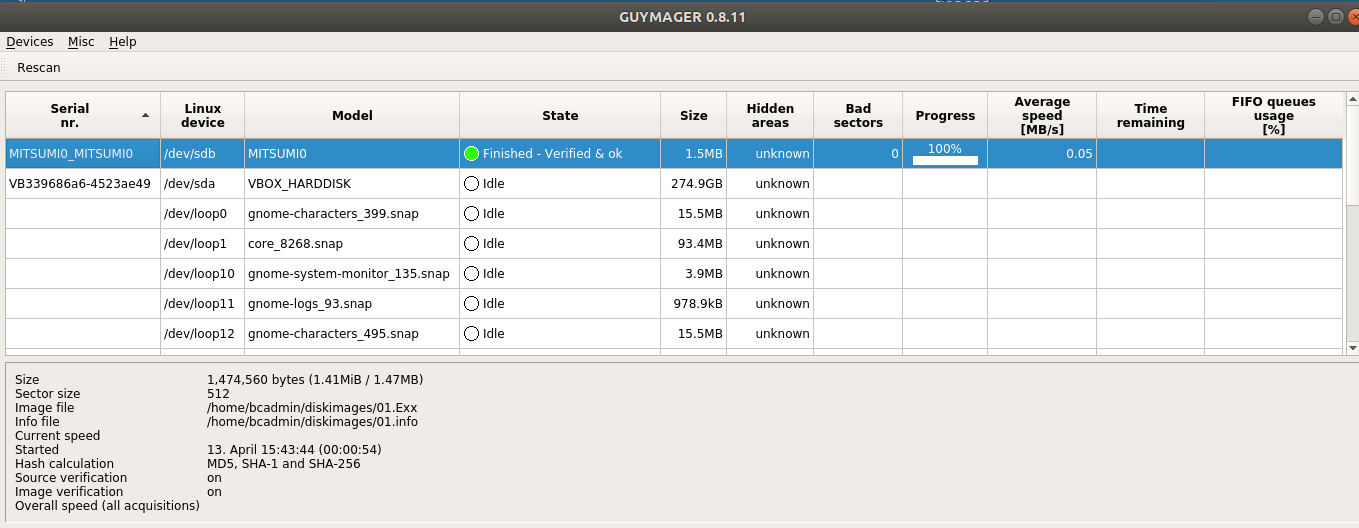
Success!
5. Now, you can go into the folder you saved the image in and have a look. There will be two files: a .E01 file, which is the disk image, and a .info text file, which is the metadata for the image, which includes the metadata you yourself added in the earlier window, as well as a checksum value:
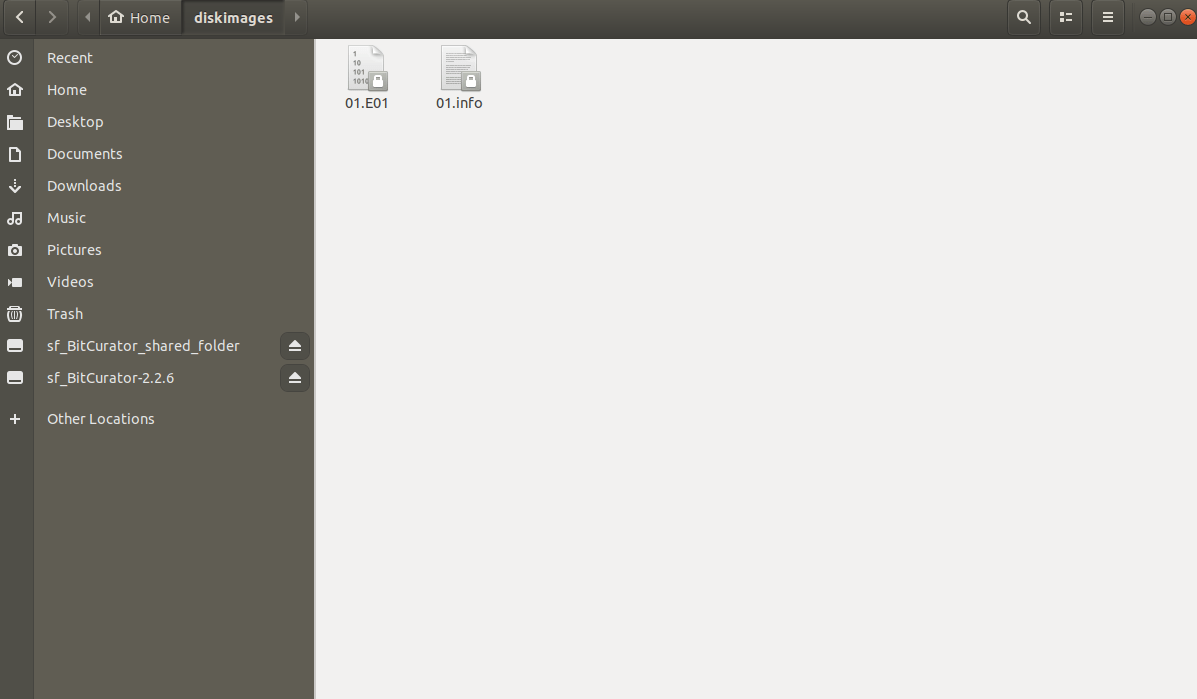
The disk image and disk image metadata files
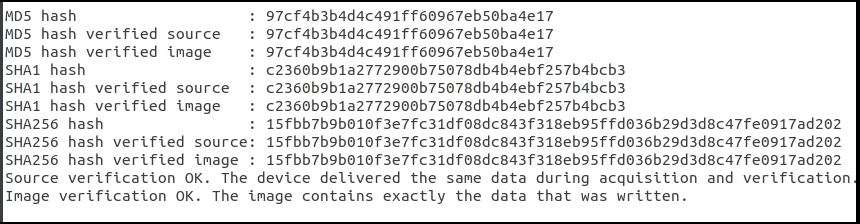
A screenshot from the disk image metadata file showing the hash values generated in the process of taking the image
And that’s it! The disk imaging process is complete; you can eject your storage media and go put it somewhere safe. For the next step in my workflow, I want to run some reports on the disk image to see if there’s any useful information that can be gleaned from it…
Leave a Reply