Muddiest Point

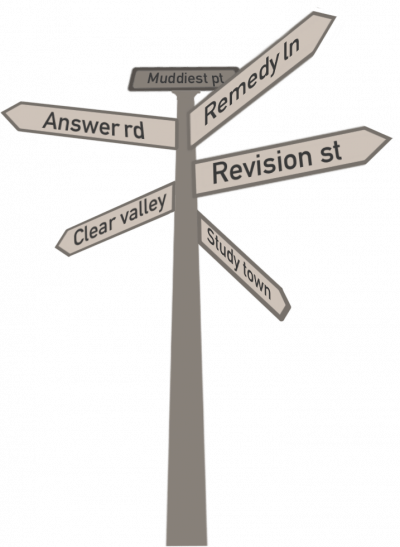
Students write down one or two points on which they are least clear.

This could be from the previous session, the rest of the course, the preceeding activity etc.

The lecturer and class can then seek to remedy the muddiness.

Example instructions for students:

Write down one or two points from the previous session that are least clear to you. 

Why use it (students and staff)

  • To monitor progress and build student confidence 
  • To receive feedback on the teaching style 
  • To make sure key points are clear 

When to use it

  • Throughout the module. 
  • Mid or end of sessions 

Digital tools that might be used

  • Moodle Forum;  
  • Moodle Chat;  
  • Echo360 Q&A;
  • Breakout room  (Zoom, BB Collaborate, MS Teams)

Speed of set up time 

5 minutes

Workload

Set-up feedback mechanism.

Other resources

  • Mentimeter 
  • Interactive response system 
  • Shared whiteboards (Zoom , BB Collaborate, MS Teams)
  • Hot questions on Moodle 

Group Answers

Students work in small groups to agree on answers – when tests are returned or in other situations.

The process of agreeing should include rasoning over the validity of the consensus answer, as well as reasoned negation of misconceptions or wrong answers.

See: Team based learning

Example instructions for students:

Having prepped independently for class, you’ll be individually tested. Then, in small groups you will collaborate on the same test, benefiting from reasoning with your peers and their feedback along with your tutor’s. 

Why use it (students and staff)

  • Deepens learning as students need to explain their arguments to others ; 
  • Reflect on their understanding 

When to use it

  • During a session
  • Between sessions 

Digital tools that might be used

  • Mentimeter
  • Breakout rooms (Zoom, BB Collaborate, MS Teams)
  • Moodle Chat
  • Moodle forums

Speed of set up time 

2 to10 minutes 

Workload

  • Create / facilitate grouping 
  • Devise questions 
  • Create quiz / discussion forum 

Other resources

Group choice – for student group selection 

Examples of use

Bouncing

A question is asked, and students are invited to respond. The answer given is developed as it is “bounced” around the room for input from different students. 

This will enable them to build on understanding and have students develop stong reasoning out of misconceptions.

For example:

  • “Aziz, what do you think of Sandra’s answer?”
  • “Sandra, how could you develop Marlon’a answer to include more detail?”
  • “Carl, how might you combine all we’ve heard into a single answer?”

Why use it (students and staff)

  • To encourage interaction between students and build upon the knowledge base of the group
  • To encourage different perspectives
  • To build a sense of community 

When to use it

  • At any points where the teacher wishes to check understanding by the wider cohort;  
  • As a change in synchronous activity 

Digital tools that might be used

Designed for synchronous activity using BB Collaborate, Zoom, MS tTeams, etc 

Speed of set up time 

A few seconds to frame the  activity and decide who to ask.

Leave at least 10 secs for students to respond.

Workload

Negligible but need to build in time for asking and asking questions and developing the etiquette 

Other resources

Proximity apps

Tell your neighbour

Students ‘tell their neighbour’ as a means of articulating their thoughts.

  • Ask a question, give thinking time, then ask students to tell their neighbour their thoughts.
  • Tell students what the new topic is and then ask them to tell their neighbour everything they know about it.

Why use it (students and staff)

  • To build confidence; 
  • To encourage reflection; To foster a sense of community;  
  • To share different perspectives on the same topic;  
  • To recall knowledge; To ‘test the water’

Possibly more feasible in smaller groups or with a seminar type setting

When to use it

Depending on purpose:  

  • at the beginning as a way to recall existing knowledge 
  • in the middle to clarify points or formulate questions 
  • at the end of the question to check understanding and outstanding points 
  • as a reflective tool 

Digital tools that might be used

Synchronous:

  • Break-out rooms (with some preparation)
  • Moodle chat
  • MS Teams meeting
  • Proximity apps

Please build in preparation time if you split students in pairs or small groups as they will need to get to know each other.

Asynchronous:

  • Moodle Chat
  • MS Teams
  • MoodleForums
  • Moodle workshop 

Speed of set up time 

1 to 30 minutes depending on resources involved and planning the structure.

Workload

Depending on resources involved and planning the structure 

  • To define the activity 
  • To prepare questions 
  • To establish an etiquette with the students 

This activity may become easier and more spontaneous if repeated throughout the modules/the sessions 

Other resources

Whiteboards

Articulate then Answer

Give students the opportunity to articulate their thinking before answering:

  • 30 seconds silent thinking before any answering
  • Brainstorm in pairs first for 2-3 minutes
  • Write some thoughts down before answering
  • Discuss with your neighbour first

Why use it (students and staff)

  • To build confidence
  • To encourage reflection
  • To foster a sense of community;  
  • To share different perspectives on the same topic
  • To recall knowledge 

Possibly more feasible in smaller groups or with a seminar type setting 

When to use it 

Depending on purpose: 

  • at the beginning as a way to recall existing knowledge 
  • in the middle to clarify points or formulate questions 
  • at the end of the question to check understanding and outstanding points 
  • as a reflective tool 

Digital tools that might be used

Synchronous and asynchronous: 

  • break-out rooms (with some preparation) 
  • Moodle chat 
  • Teams meeting 
  • share document (for the entire group) 
  • whiteboard 
  • Mentimeter (open questions) 
  • annotation software 

Speed of set up time 

10-30 minutess depending on tools being used

Workload

Depending on resources involved and planning the structure: 

  • To define the activity 
  • To prepare questions 
  • To establish an etiquette with the students

This activity may become easier and more spontaneous if repeated throughout the modules/the sessions 

Other resources

Shared whiteboards (Zoom or Blackboard Collaborate)


Students ask questions

Create opportunities for students to ask questions – of their peers or lecturer or to start discussion.

Why use it (students and staff)

Enables students to reflect on their learning and helps indentify any misconceptions or gaps in knowledge.

Allowing  time for students to ask questions about pieces of work helps open up assessment and eliminate abiguity.

When to use it

Questions can be sourced before, during, after class 

Digital tools that might be used

  • Mentimeter  
  • Forum 
  • Chat 
  • Hot Questions 

Speed of set up time 

5 minutes to15 minutes, depending on tool used and number of question opportunities

Workload

Creation of Moodle activity or Mentimeter presentation.

Students write questions

Students create and submit questions to the class about what they would like to know more about a topic.

For example:

  • about what they would like to know on a topic,
  • to ask the lecturer or other students in order to assess their learning,
  • or to demonstrate their learning, misconceptions, or areas they would like to further explore.

The class can work on these together in a session or use them to prepare for the next session. 

Why use it (students and staff)

Encourages reflection on learners’ gaps in their knowledge or understanding. 

 If students write questions for their peers to answer it can deepen their own understanding and that of peers. 

When to use it

  • At start of class as  revision 
  • At mid or end point to check on understanding 
  • Independent study task 

Digital tools that might be used

  • Hot Questions  
  • Discussion forums 
  • Chat 
  • Mentimeter 

Speed of set up time 

Variable

Workload

Creation of Moodle activity or Mentimeter presentation 

Good question stems

Students answer questions to encourage deeper thinking and reflection.

Typical questions might be:

Why does …?

What if …?

How would you …?

Could you explain …?

What might …?

Why use it (students and staff)

  • Can be used to encourage peer activity 
  • Develops student self-regulation – what do students know about a subject and its relationship with other subjects 
  • Could form the basis for one minute paper activity 

When to use it

  • At start of class as revision 
  • At mid or end point to check on understanding 
  • As peer activity 
  • As an independent study task 

Digital tools that might be used

Synchronous : 

  • break-out rooms 
  • chat 
  • Teams meeting 
  • Mentimeter 
  • Shared whiteboard 

Asynchronous

  • share document (for the entire group) 
  • whiteboard 
  • Menti

Speed of set up time 

5 minutes 

Workload

Depending on resources involved and planning the structure:

  • To define the activity 
  • To prepare questions 
  • To establish an etiquette with the students

This activity may become easier and more spontaneous if repeated throughout the modules/the sessions 

Other resources

  • Screen clock  or count down timer 
  • Note taking facilities for students 

Talk partners

As a plenary or a starter to a session, students share with a partner:

  • 3 new things they have learnt,
  • what they found easy,
  • what they found difficult,
  • someting they would like to learn in the future.

Example instructions for students:

In pairs, discuss 3 new things you have learnt or what you found easy or difficult or something you would like to learn in the future. 

Why use it (students and staff)

  • To build confidence 
  • To encourage reflection 
  • To foster a sense of community 
  • To share different perspectives on the same topic 
  • To recall knowledge  
  • To ‘test the water’ 
  • (Possibly more feasible in smaller groups/ with a seminar type setting) 

When to use it

Depending on purpose:  

  • at the beginning as a way to recall existing knowledge 
  • in the middle to clarify points or formulate questions 
  • at the end of the question to check understanding and outstanding points 
  • as a reflective tool 

Digital tools that might be used

Synchronous: 

  • break-up rooms (with some preparation) 
  • chat 
  • Teams meeting 
  • Proximity apps 

Please build in preparation time if you split students in pairs/small groups as they will need to get to know each other.

Asynchronous: 

  • Chat 
  • Teams 
  • Forums 
  • Moodle workshop 

Speed of set up time 

1 minute to 30 minutes depending on resources involved and planning the structure.

Workload

Depending on resources involved and planning the structure:

  • To define the activity 
  • To prepare questions 
  • To establish an etiquette with the students 

 This activity may become easier and more spontaneous if repeated throughout the modules/the sessions 

Other resources

  • Proximity apps 
  • annotation software  
  • whiteboard 

Graphic organiser

There a range of graphical organisation techniques that can be used in reflective and organisational ways. These can include:

  • webs,
  • triangles,
  • Venn diagrams,
  • ladders,
  • and PMI diagrams

Example instructions for students:

Use a graphic organiser to help you structure and represent information 

Why use it (students and staff)

Enables reflection on what students have learnt or understoodHelps organise content during a session or from reading 

When to use it

  • At start of class as revision
  • At mid or end point to check on understanding 
  • Independent study task 

Digital tools that might be used

  • Handwritten paper photographed and uploaded (E.g. via MS Office Lens)
  • Use of whiteboard in online synch session (group activity) 

Speed of set up time 

1 minute

Workload

Staff might provide examples of graphic organisers 

Other resources

  • Mind map software
  • Templates